|
| Two brothers and a game of Chinese checkers. |

 I was talking to a good friend the other day. She has a delightful little daughter, who is a kindergartner. The little girl, like my youngest son, was probably what Mary Sheedy Kurchinka had in mind when she wrote her book, Raising Your Spirited Child. The two of us were chatting about how school was going, and I said that (after a brief few months back in public school) my son was looking forward to homeschooling again in the fall.
My friend thought for a moment, then said, "Well, if I were smarter, I'd probably homeschool my daughter." I felt sad. We are all smart enough to teach our own children!
Lots of parents who are considering homeschool (and even teachers who teach in public schools!) ask me how we do it -- how do we decide what to teach, how do we make sure that we "cover" everything, etc., etc. I don't have answers to all of those questions, but I can tell you that my son can read and spell everything, knows stuff in science that most adults don't know, and just loves the story of Richard the Fearless of Normandy. I think he's an ok kind of kid!
But I know that it was helpful to me (and still is!) to hear other homeschoolers talk about homeschool. So I thought about the first thing that most parents think of when thinking about homeschool curriculum: teaching literacy.
Literacy includes many different parts: reading and writing, spelling, vocabulary, listening and speaking, grammar and language. Teachers use state standards to teach all of these parts. But, in homeschool, this can seem overwhelming -- so there is an easy way to make sure that we cover all these things, and we can do it in a way that, well, seems like home.
 The Daily Five is a skinny little, wonderful book written by teachers with school teachers in mind, but they describe literacy in a very parent and child-friendly way. In their book, the authors, Gail Boushey and Joan Moser (lovingly referred to as "the Two Sisters") break literacy up into five different activities:
- Reading to Self
- Reading to Someone
- Listening to Reading
- Working with Words
- Working on Writing
Here I'll address each one, and give you ideas for how you can make sure you are providing a rich experience for your child at home, without turning your home into school, or spending a lot of money.

Reading to Self
Research shows that the more kids read, the better they read. And, the more they read, the more words they know. And the more words they know, the smarter they become. So reading is a good thing!

 When I was a classroom teacher, parents would ask me what they should get for their kids to read. I said, "Anything they want to read!" There is merit in anything: encyclopedias, wordless picture books, the back of the cereal box, the telephone book, the same dog-eared copy of Captain Underpants that you've read 72 times already... Whatever your child wants to read is a good read.
I "require" 30 minutes of reading as independent work, each day, but that is rarely a problem. I also have "bribed" my kids (all of them) into going to bed on time by allowing them to stay up a half-hour past their bedtime if they are in their beds reading (this has worked in our home for 24 years, and most of my students' parents report it to be a success, too!).
 The simplest way to keep track of your child's independent reading is through a reading log. There are so many forms of this. DonnaYoung.org has a number of homeschool book lists that you can print out and keep in your plan book, or you can create your own and print it out. Teach your little one how to write the title and author, and how many pages/minutes he read. Sometimes I would add something else to the log, depending on what we were working on: genre, a simple rating scale, who would enjoy this book (audience), etc. [We also keep an inexpensive spiral notebook as a response journal, where I would write questions (mostly "think about" kind of questions, like, "Why do you think Opal's dad doesn't want to talk about her mom? What are your clues?"). I made sure that I wrote back. More on this in the "Work on Writing" section.]. Use Scholastic's "Book Wizard" to find great books.
My kids could spend the whole day in the library. Nowadays, there are so many activities in the local library: computers, story hours, visiting speakers, arts and crafts times, and reading contests. Many libraries in the city (like where we live) serve lunch during the week in the summer, and snacks after school. If you don't have air conditioning, it's not a bad place to hang out on a hot day. If you tell your librarian you homeschool, she will often be on the lookout for books that you want to use in your studies, too.
 Now that my son is older, some of his assignments have independent reading parts. When kids are very little, they might just "look at" books, but this is reading, too. The idea is for them to independently engage in reading things they like to read, to develop of love of reading. If you want to check the reading level of the books your child is choosing to read on his own, check out Scholastic's Book Wizard tool, which is easy to use (see the "Teaching Tip," above, and the screen shot image, for an example of what you get from the tool).
Reading to Someone
Reading to someone helps children develop oral reading fluency. What this means is that they read smoothly, at a natural pace, with proper expression, and that they read accurately. Children that can read fluently out loud tend to be the children that also understand what they are reading, better.
When children struggle over words, they read texts too slowly to connect the words together, which is what makes meaning. This also tells us that they are having such a difficult time identifying words that they are missing what the story is all about. On the other hand, kids who read too fast also miss the story line.
There are lots of easy ways to make time for your child to read out loud.

- Switch roles. I read to you, or you read to me (take turns - give the child a choice).
- "Read to Me" Fridays. Let the child choose the book she wants to read.
- Read plays together. Take roles and read the play like a "Reader's Theater."
- Share the dialog. Let one person be the narrator, and the other read the dialog, in novels.
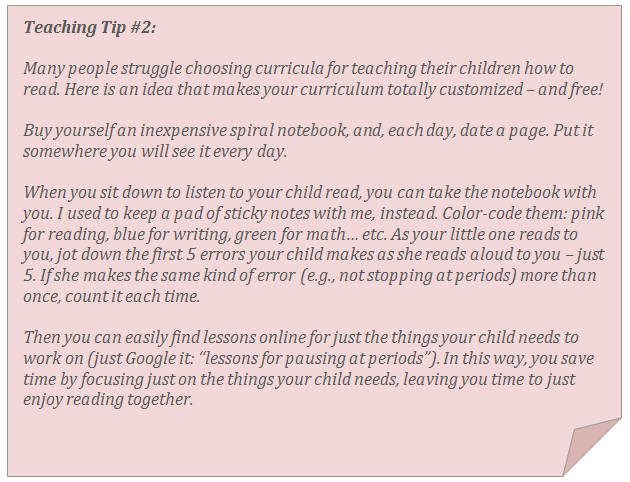 I don't use a reading curriculum. I listen to my son read, and keep track of what his errors are, then find lessons online to address those specific things (see "Teaching Tip #2"). For example, if I search online for lessons on pausing at periods, I find many ideas for helping students to pay attention to punctuation, from color-coding different types of punctuation, to practicing reading sight-word phrases instead of individual words, to reading fun books like Eats, Shoots and Leaves: Why, Commas DO Make a Difference!
Listening to Reading
 This is probably the biggest advantages that homeschoolers have over public schoolers when it comes to reading instruction: the fact that so much of our "instruction" during the day is read-aloud. Children learn how to be fluent, problem-solving, understanding readers when a fluent, problem-solving, understanding reader models for them! (Pssst.... that's YOU!).
The purpose of listening to reading is to learn what good readers sound like, what they do when they read, and how they think. Read-aloud is the best way for you to do this with your children. You don't have to even be a stellar reader to be a great reading teacher. I have a teacher-friend who excels at reading instruction, because she, herself, was a struggling reader until about grade 4. She knows where children get stuck, because she did, herself.
To choose great read-alouds, check out the Bookfinder at Simply Charlotte Mason, where you can search by grade-level, curriculum year or topic.
Here are other easy ways that you can vary this part of literacy:
- Books on tape/CD. One of my children wore out his audiotape of Chicka Chicka Boom Boom
as he read along. Nothing like Ray Charles teaching you how to read!
- Story time at the library. Many public libraries have story hour during the week, for preschoolers. Your younger elementary homeschooler might enjoy these opportunities. Often, towns will bring in guest readers or visiting authors to read, or even perform with puppets or drama -- a nice change-up from reading at home.
- Stories on TV. There is a place for the judicious use of "screen time" in homeschool. My eldest used to enjoy Reading Rainbow, which boasted an assortment of guest celebrity readers, as well as book reviews by other kids. You can find free episodes to watch online, too (see the link, for one site).
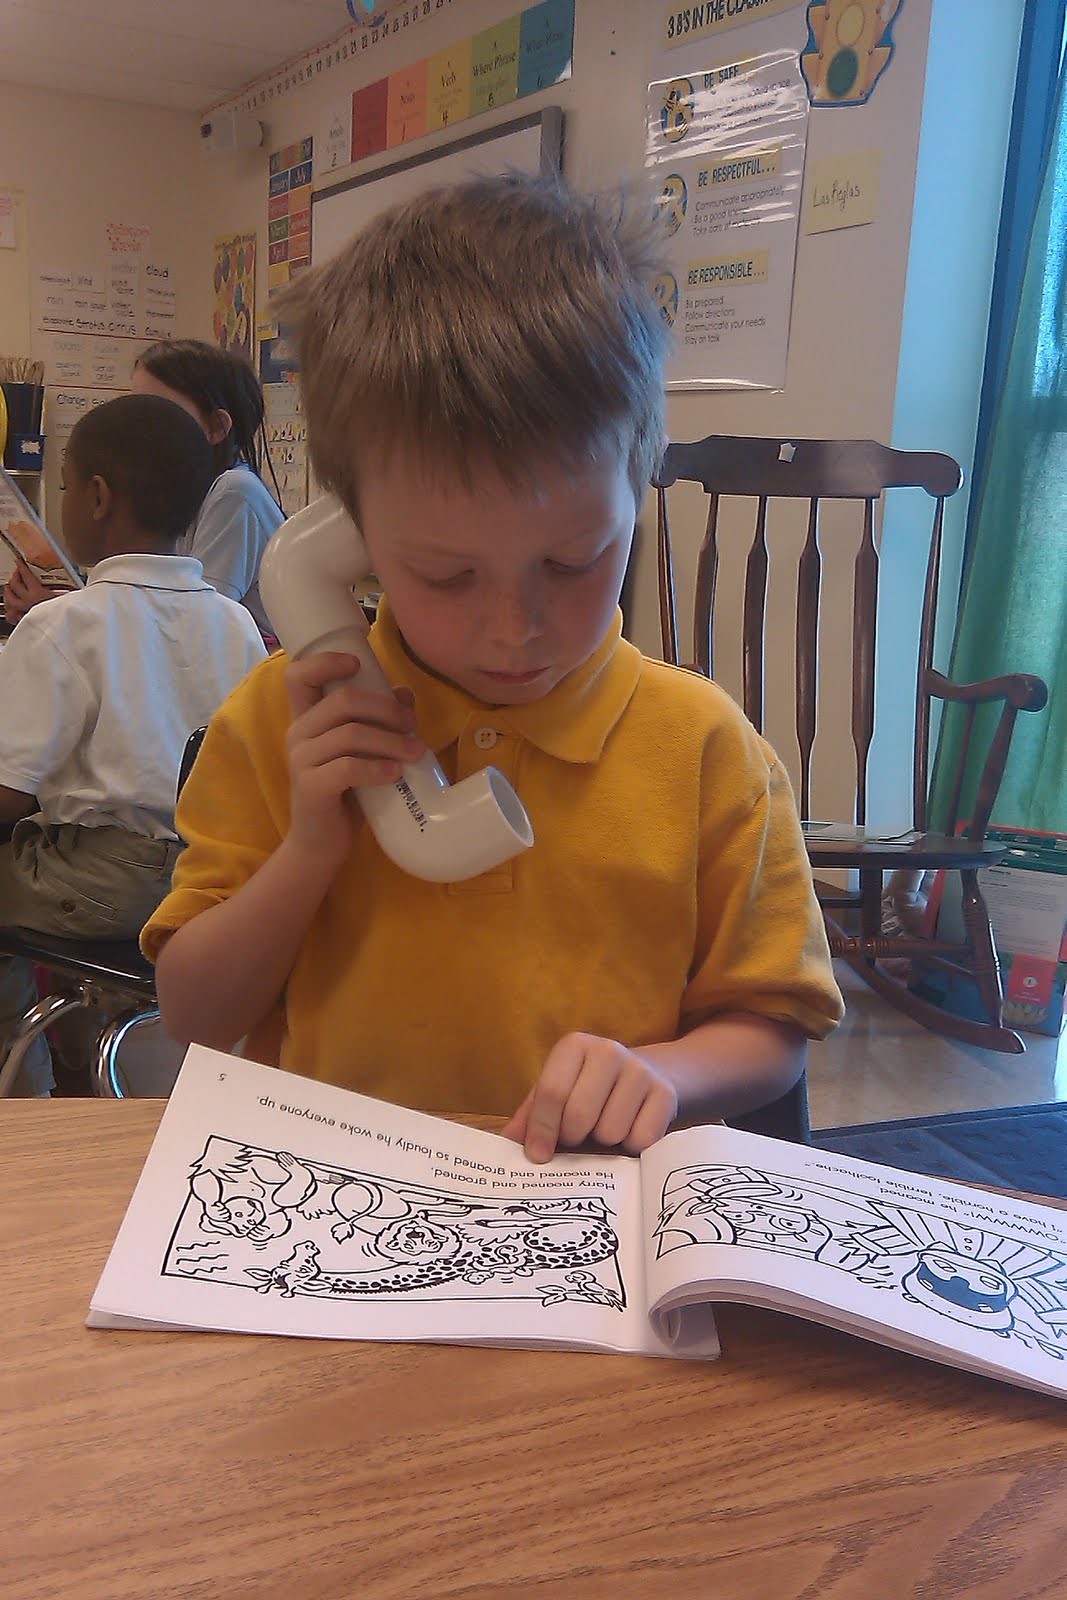
- Whisper Phones. Some of my teacher friends have been using these tubular contraptions, and one even had her husband make them out of PVC pipe and elbows. I am including a photo of a first grade student using one (click on the link to go to the teacher's website), and a link to plans for making your own, in case you'd like to try that idea out. The idea behind it is that the student who is working on reading more fluently hears himself reading in a whisper, and pays attention to his own reading better than by reading aloud. Kids love them, and they do seem to work.

Working with Words
We love word play in our house. My husband can switch syllables and starting letters around in words so quickly that sometimes we have to pause and figure out what he just said. Jokes abound, and we try to outdo one another with what we call "refrigerator words" -- the kind that you write down on a paper and hang on the refrigerator to remember later.

Working with words in homeschool is easy as can be. Here are some ideas that are fun for families, and reinforce how words work and are put together:
- Word games. Our family favorites include Scrabble, Boggle, and Upwords.
- Crossword Puzzles. Our science workbook (Flying Creatures of the Fifth Day) includes a crossword puzze as a review of each lesson.
- Books about working with words. Some ideas: Frindle
, The Word Eater
, Donavan's Word Jar
.
- Books that also have fun with words. Anything by Dr. Seuss, Alice in Wonderland, and Shel Silverstein poems.
 My sister-in-law taught my nieces how to read at a very young (pre-K) age, by labeling objects around the house. Everywhere the girls went, the objects were labeled: "table", "refrigerator", "chair", "stove"... If you are wanting to work on sight words, this is a more natural way to teach them than sheer memorization. Sight-word bingo is another fun way to learn sight words. You can find many sites for printing out bingo boards.
 If you want to work on particular phonics lessons, make them game-like. Write the chunk you are studying ("pl-" for example) on an index card, then use Scrabble tiles to build the rest of the word. Sort the words you make into sense and nonsense words.
When my eldest was a toddler, I used one of those photo albums with the clingy pages, and labeled each page with a letter of the alphabet, upper- and lowercase. We would cut out pictures from magazines of things that started with that letter, and add them to the album. We would start each day by reviewing our album, then add a few more things. He loved this alphabet book for years. You could make different pages for older students.
Working on Writing
We have all but eliminated any difficulties regarding writing for homeschool, through two means: notebooking and a free-writing journal.
We use notebooking extensively in social studies and science. Our notebooks are full of maps, diagrams. poems, penmanship practice, word lists, questions and answers, stories, and graphic organizers. But mostly they are full of writing, of all kinds!
My youngest son is a very smart boy. In public school, children are pushed to begin to write at an early age. I don't mean the "conveying my thoughts and feelings through words and pictures" kind of writing, but the "sit down and write a story" kind of writing. I can tell you, as a homeschool mom and a public school teacher, my very bright boy did not like to do written work through second grade and most of third. Now, every now and then he would write something that would blow our minds -- he's a very talented writer, and likes to write, but not when he is ASKED to do it.
With notebooking, I print out several notebooking pages that fit a lesson, some with space for a big picture, some with several smaller pictures and lines, some with maps, some with timelines, etc. I let him choose which he wants to use that day. He knows that 1) there will be the expectation of excellent work no matter which he chooses and 2) eventually he will end up using the other notebooking pages. His notebooks have grown in quality, because he has been allowed choices of how to respond.
The other writing work he does is in his "free writing" notebook. Currently, he has three or four notebooks full of drawings of superheroes he has invented, complete with their bios and specs. His drawings are detailed and labeled, and his bios are excellent summaries. He will spend days adding to his notebooks. I can pretty much teach anything I want to teach in writing, using one of his notebooks.
The point is this: writing is more than stories and reports. It is lists, and directions, and calendar entries, and text messages. It is a silly poem or a note to a friend. Make yourself feel better by writing down everything you write during the course of a day. Here's my list for today:
- This blog
- The check for my bills
- My "to-do" list
- Two text messages to my elder two sons
- A Mother's Day greeting to my mom, sister and sister-in-law on Facebook
- A business email to a client

To find lots of notebooking pages for my homeschool needs, I have a subscription to The Notebooking Treasury. You can find notebooking pages for just about any topic you want to study. Join the Notebooking Pages Treasury now during their NotebookingPages.com 6th Birthday Sale-a-Bration Event and receive an extended membership, chance to win some great prizes, & access to their new notebooking web-app for creating, customizing, & completing your own notebooking pages (coming in June 2012)! The perks are nice. Another trick I learned was to Google "notebooking," then switch the view to "Images." You'll see all kinds of notebooks created by homeschoolers, and their blogs usually tell you about other sources of notebooking pages. We homeschoolers love to share!
My homeschool friend, Barbara, blogs about nature study, art and many other topics at The Handbook of Nature Study. Read her article about notebooking with teenagers here.
I hope you have been encouraged in your homeschool efforts, and have found a literacy activity that is a just-right activity for you and your child.
Have a marvelous spring!