{First published in "Books and Blooms," 7/12/2012}
Right
now, in New England, we've pretty much finished picking strawberries,
and are now heading into blueberry season. It will be a minute before we
will be out collecting bags of apples.
But I noticed
at Wal-Mart the other day, that there are shelves and shelves of
notebooks and lunchboxes on display, and I just got my son's school
supply list from his fourth grade teacher, so can September be too far
off?
For those of you preparing curriculum for the fall, come see my new science journaling pages.
"An Apple a Day" is the first in a series of science journaling pages that follows the apple tree throughout the year. This first set focuses on the formation of the apple fruit from the flower.
The next set will focus on the fall colors of fruits and leaves.
When you live in a family of horticulturists, plants just... happen. I
spent the last week acquiring new additions to my front garden. Here
they are!
My New Garden, in June...
I'm participating in the "3 in 30 Challenge",
and one of my goals for June was to install a new flower bed in my
front yard. My dream was a kitchen garden, where I had a smattering of
veggies, herbs and flowers to bring in to the dining area for cut
flowers.
Hydrangea - we're still trying to figure out
which one this is...
This hydrangea was one of a
batch that was not in flower, and had not been labeled, so it was
impossible to identify (or sell) at the nursery. We're still trying to
figure out what variety it is -- we had thought it would turn out to be
'Endless Summer,' but the colors are wrong. You should see how it looks
today! Each flower head could actually be cut and floated singly in a
low dish as a centerpiece -- they are just enormous.
I
have several hybrid tea roses, which I share below. The yellow is not
yet identified. The red, 'Don Juan,' fairly glows at dusk -- my husband
was admiring it from the front porch one night, and said it just screams
out, "Alive!" Very poetic guy... The third rose is called 'Love,' and
I'll have a photo of it next time -- white buds, edged in red, opening
to red on the inside.
Hybrid Tea Rose -- no label so your guess is as good
as ours!
My son brought more roses home yesterday -- I don't know their names yet, but here is what will come home to Mama (!) today:
another yellow, with the most amazing scent...
a red that's nearly lavender...
one called 'Joseph's Coat' that my son knew I'd like, just because
of the name, but it is beautiful, with yellow buds tinged in orange, and
red edges to the petals...
a coral-colored one...
He had an orange-orange one, but, before I could point and say,
"Ooh! I want THAT one!" he said, "And you can't have the orange one,
because I want it!" Darn it. Those cut-throat gardeners...
Hybrid Tea Rose - 'Don Juan'
Some people avoid hybrid teas as "too
finicky," but I find roses to be no trouble, at all. Sometimes you have
to watch for mildew, especially on the fuller ones and especially if
your weather has been sultry like ours has. But I don't consider cutting
back spent flowers and removing spotty leaves to be a big chore -- it's
kind of therapeutic at the end of a work day. Maybe that's what people
are considering "high-maintenance?" Don't know. I call it "puttering,"
and it makes me happy.
New roses, cleaned up and ready for planting
I love to
rescue plants and resuscitate them. I have been known to frequent places
like Lowe's and Home Depot, looking for the carts where they stack the
unsaleable plants. If you know plants, and "big box" stores, you know
that something becomes unsaleable when it is out of bloom. I don't care
if I have to wait until the next year, when I can buy up a bunch of the
same things for a mass planting, and only pay $0.25 (or nothing!)
apiece. I acquired an entire planting of ornamental Solidago at Lowe's one year, simply because the flower heads had gone to seed, and the employees thought they were all weeds!
My
new roses cleaned up nicely. The next batch are some interesting
(mis)shapes, so I'm thinking I'll cut them back hard after they finish
flowering.
Siberian wallflower - a wonderful wildflower
that is easy to start from seed
My neighbor had a pot on her
front step. It contained the remnants of a plant long since expired, in
petrifid peat moss. She is a very nice lady, a retired nurse, and I told
her one day that I was going to plant something nice in her pot and
leave it on her step.
I had this package of
Siberian wallflower that came (I think) as a freebie in some gardening
junk mail. I never throw any of those seeds away. Usually, I save them
all up (wallflower, cosmos, viola, herbs, all those other things they
send you), buy a nice wildflower mix, mix them all together and then
broadcast it somewhere that needs color but not gardening. Most
wildflower seed shouldn't be covered, as they need sunlight to
germinate. Wallflower comes up right away, but it's a nice surprise to
come back a couple of years later and find a lupine or other biennial
flowering.
Bidens, or Beggarticks
I have many different types of Coreopsis. This is not actually one of them, although it looks like one. This close ally is one that I bought at Wal-Mart, called Bidens, or Beggarticks. Like Coreopsis,
it is very durable, and hasn't once withered or shown signs of stress
during our incredible heat wave. My rosemary also has enjoyed the more
Mediterranean clime we've had lately.
My middle son
teased me about the containers that have placed in spots around the
garden. Until the plants grew up, I wanted some more vertical elements.
Plus, terracotta is cute. He later admitted that he really liked it and
was just giving me a hard time.
Then he went out and
installed a slammin' garden of his own. I like to think that his mother
inspired him! Plus all those beautiful plants he and his brother work
with all day -- it would be hard for me to bring home any money. My
family would have to learn to live on beauty, alone.
Eggplant 'Black Beauty'
I love interplanting veggies, herbs and ornamentals. I rarely have insect problems, because I use companion species, such as Nasturtium (which
is so tasty it lures the bugs to it instead of the veggies AND you can
put the peppery flowers and leaves in your salad), the ubiquitous
marigold (I'm partial to the dwarf, dark single-blooming kinds) and
others. I notice that the squirrels wait until my eggplants are about
the size of eggs, then, just as I'm beginning to fantasize about a good
"parm," they steal them. So I planted my eggplants in the front bed,
where the squirrels won't venture. We'll see.
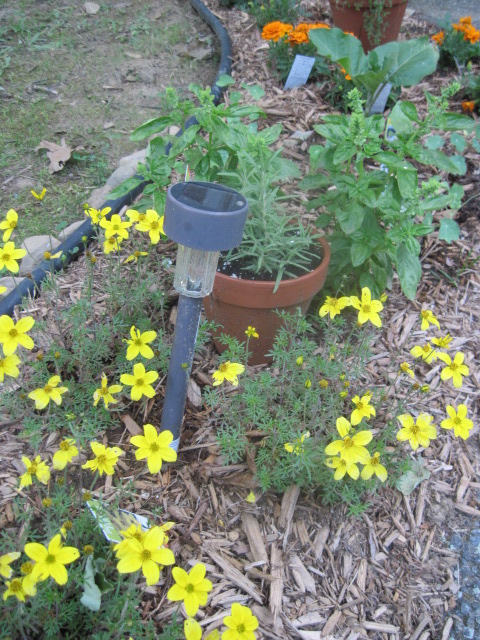
Planting solar patio lights in pots
I planted some different herbs this year. I have the
regular English thyme, and an ordinary (but wonderful) basil, but I also
have licorice basil and a wild oregano, some wild monarda, and I'm not
sure what else (because I sprinkle the seeds in places everywhere). Nice
butterfly magnets, and the sun on the basil by the front walkway smells
heavenly.
I am trying something different with my
patio lights this year. Why shouldn't I get to enjoy my garden when I
sit out in the evening, too? I "planted" my patio lights to highlight
spots in the garden, and I love it! Here's something I discovered: if
you put a patio light in a hanging basket, it acts like a porch light,
without electricity! My little guy also told me the mom of one of his
friends started putting her patio lights in her hanging baskets, too.
There
is a little toad that hides under the pot at night. Did you know that
one toad can eat 10,000 pests in three months? Love your toad -- plant a
toad house.
The marigolds have not cared at all about heat, drought,
or any other adverse conditions!
Speaking of toads... Garden Toad's Companion Plant Guide
lists a bunch of plants that can be planted as companions to your
veggie plants, and the way that they are beneficial. Lots of my things
are on there, but next year I'd love to do more purposeful planting --
I'm already excited...
My
nasturtiums are tumbling everywhere! I like the old-fashioned, rambly
ones because they weave their way among the vegetables and flowers,
providing spots of unifying color all over. This planting is in a pot
that contained pansies (still doing well, in spite of the heat). My
thinking is that the pansies would fade in time for the blooming of the
nasturtiums, but it looks like they might co-habit, after all!
I
found some nasturtiums growing in a place I don't remember planting
them. It's hard to believe that I spilled those humongous seed and
didn't notice. Do you sometimes plant things and forget that you planted
there?
There are worse surprises!
Hypericum (St John's-wort)
I have a little creamer pitcher that I
keep on my dining room table, that is the perpetual flower arrangement.
The other day, I noticed these Hypericum (common St. John's-wort) flowering by the edge of the driveway, and cut a few to add to the arrangement.
If
you want a field guide that is friendly to kids and people who aren't
familiar with plant classification, then the Peterson guides are great.
Plants are organized by color, then you use botanical features to narrow the selection. This is the wildflower guide that I used.
Before the St. John's-wort came to live on
the table, I had trimmed some new perennials after they were
transplanted, and used the trimmings to create an impromptu arrangement.
Here are some of the Coreopsis that made their way to the dining area.
You can read more about this photo in Weekly Photo Challenge: Create. If you enjoy taking photographs, and have a WordPress blog, consider participating in this photo challenge.
Another photo challenge I participate in is the OHC Summer Photo Challenge,
sponsored by the Outdoor Hour Challenge. Details about this challenge,
and how to join up, can be found on the blog link, above, or at Barb's
Pinterest board, Summer Photo Challenge, OHC.
Next to blogging, I love taking photographs of stuff to blog about best!
Stay tuned for updates on my garden. Until next time, happy gardening!
Even the tiniest flower bed or vegetable garden can be a rich source of nature studies for all ages. Even if you only have a sidewalk planter or a patch of vacant lot, you can learn great things about the plants that God gave us for food, beauty and shelter.
Check out the notebooking pages from my friend and fellow homeschooler, Debra Reed -- you won't be disappointed!
Over
a single day last week, there was an influx of all kinds of interesting
moths to the garden. I took pictures of a few of them that sat still
long enough. Here are my visitors:
Harnessed Moth [(c) 2012 Kim Bennett]
Rosy Maple Moth [(c) 2012 Kim Bennett]
Common Gray [(c) 2012 Kim Bennett]
Great pages for insect study!
Stay tuned for nature studies on moths and butterflies in future posts on "A Child's Garden."
"He
is the Rock, His work is perfect: for all His ways are judgment: a God
of truth and without iniquity, just and right is He." -- Deuteronomy
32:4
I
just finished putting together my shopping list for the rock garden I
want to install in the back yard. I am going to try some trench gardens
in the cracks and crevices that are in the ancient stone wall that runs
across my back yard. Here's my list, so far:
The old stone wall behind my house
Sedum - creeping varieties
Thymus - I have a lemon thyme -- looking for something different
Lewisia - a new one for me
Saxifraga - also new for me
Eriogonum umbellatum - another newbie
Salvia pachyphylla - a different Salvia from the ones I have
Campanula - I saw a picture of a compact one in BH&G, but only have a tall one in my yard, to date -- would love a midget size one
Heuchera - I collect these...
Alyssum - an old stand-by for rock gardens
Dianthus - the grass pinks...
Scabiosa
Euphorbia - compact ones...
Lobelia cardinalis - I never saw a compact form until I saw BH&G's rock garden slide show; I have a shady, damp spot that would be perfect
I'm off to the garden center to look for landscape edging,
potting soil and wood chips to construct a flower bed in my front yard.
I'll keep you posted on the progress as part of my 3 in 30 Challenge. Click on the button to start your own challenge! And see my blog posts at A Child's Garden for updates on how I'm doing on all my gardening goals!
I
was sent to Home Depot the other day to buy new blades for the weed
whacker. I told my husband that this hanging fuchsia somehow got into my
cart and I must have accidentally paid for it, because, LOOK! here it
is in my trunk!
My husband just smiled. He
lets me play with plants, because it's a lot cheaper than most vices
folks might have, it makes us happy, doesn't get anyone into trouble,
and makes us feel like we are continuing where Adam and Eve should have
left off.
We
like to sit on our front porch in the evening. There is a common
"green" with a little gazebo in it, in the center of our neighborhood.
All the children (and their parents!) congregate there for frisbee golf,
cookouts, guitar and drum practice, and general fun. So we hung our
hanging baskets on the front porch.
Within a day, the
hummingbirds found the basket! My husband enjoys them immensely,
commenting on how loud their wings are when they whiz past your head,
and how unafraid they are. It makes me very happy to see them.
I have written in the past about other flowers that attract wildlife. See Humming (Sphinx) Moths for a list of other plants you can include in your garden, to attract birds, butterflies and other wonders.
This year marked a year of big changes for many members of our family - new homes, new jobs, new families... And all of us have felt the pinch of an economy that hasn't kept pace with our basic needs and bills.
Many of us scaled back greatly on our holiday expenditures, in response to our precarious times. But what we discovered, when we cut back, was a blessing of gifts that were perfectly matched and perfectly made by the gift-giver. The LOVE made them perfect -- not the price tag:
a hand-crocheted "big" scarf...
home-made chocolates, in many flavors...
stained-glass Christmas cookies...
herb-infused cooking oils in beautiful carafes...
hand-made pathchouli-scented soaps...
bean-soup mix in a decorative canning jar...
woolens made from wool from the family farm...
This made me re-dedicate myself to creating hand-made gifts that show more than my ability to pull out a credit card the week before Christmas.
If you are a homeschooler, and you follow Charlotte Mason, you know that handicrafts are one of the "subjects" she believed all children should study, believing that all children should be able to make beautiful, useful things with their hands. Perhaps you have a scout in your house who is looking for a project or two for a badge. Maybe you just enjoy crafting and are looking for ideas that are more than just the typical kid crafts.
Here is a list of 12 DIY projects and craft ideas that are suitable for kids to create. They can be finished in a month, giving you the possibility of doing all twelve just in time for holiday gift-giving in 2014. I have listed them by month -- but you can do them in any order you'd like.
Click the links to see directions to make these, or see more like them on my Crafts for Kids Pinterest board.
Do you have a bunch of old glass ornaments with the colorful coating peeling off? Don't throw them away! If you soak them in warm, soapy water, the remaining coating will come off, leaving a clear glass orb that can be re-purposed into these wonderful keepsakes.
Simply remove the hanger at the top, fill with small objects that remind you of a special time together (beach glass from a vacation, tiny hemlock cones from a hike, blue confetti to celebrate the birth of a baby boy...), return the top, and decorate with a ribbon. For added flair, use a permanent marker to note the special occasion.
Don't have any old ornaments? You can pick up clear ornaments at most craft stores.
Wrap them in bubble wrap and store in shoeboxes until next Christmas.
Alternative: Dribble several drops of oil-based model paint inside the empty globe (metallic-toned gold, silver, red and green look nice for traditional Christmas colors). Put the top back on, and gently turn the ornament over and over to coat the inside with paint swirls. I made these with third-graders one year, to take home as gifts -- they were a hit!
February: Hand-folded Gift Boxes from Greeting Cards
Do you wonder each year what to do with all those Christmas cards you get each year? My ten-year-old gave gifts this year, presented in beautiful boxes that he created from folding old greeting cards.
These are simple enough for even young children to make, with items you already have at home. Do you want a demonstration? Here's a great video to show you how...
You could make a raft of tiny boxes to fill with hand-made food treats, or to give as a gift, themselves. Pack them in a shoe box to keep them safe until next year.
March: Hand-printed Wrapping Paper
(c) 2011 The Firebottle, via Creative Commons License.
Okay. I hate to throw ANYTHING away. Especially if there's a lot of it. Every once in awhile, I receive a package that is stuffed with yards of blank newsprint paper. Sometimes there is so much, I wonder if they realize how much good stuff they are throwing away in the packing materials! My boys always eye it for making huge battle maps, so we flatten it out and roll it onto an empty wrapping paper roll for someday.
You can use a cool iron to remove the wrinkles from this paper, which is now a "canvas" for some great hand-printed wrapping paper.
You can decorate the paper any way you want to, really, depending on the age of your kids: markers, finger paint, stickers, drawings, vegetable prints -- you name it. To make a really wonderful paper with a nice, repeating pattern, get a roller stamp (the kind you use to make a pattern border when you paint a room), and use a yard stick as a guide (I am not great with straight lines!). You can buy craft paint in a zillion colors at any craft store or Wal-Mart -- and get painting!
My first Christmas on my own, I was homesick and poor. I bought the last Charlie Brown Christmas tree available on the only lot that was on my way home from work, and the last stand. And cried because I didn't have any money to buy any ornaments.
Hand-tied bows and hand-painted ornaments (c) A Child's Garden, 2013.
BUT I did have a crafty mom, and her crafty genes passes along to me. So I headed to a local department store, and rummaged through the remnants of the fabric department for wide ribbon. A few simple twists, and I made a whole tree full of hand-tied boys, with two partial rolls of ribbon. Here you can see them, along with another hand-made ornament (courtesy of Little Man)...
If your child can tie, he or she can make these bows. I used wide ribbon - 2" wide. Don't until these to store them -- simply stuff the loops with rolled up paper, and put a set of them in a shoe box for gift-giving next year.
May: Commemorate a Special Event with Photos in Hand-made Frames
We always give those studio photos of our kids that you take at department stores and school photo fundraisers. This Christmas, I handed out envelopes with Little Man's photos to the adult children, and the Nurseryman thought out loud, "I always wonder what to do with the old photos." I didn't have an answer for him. But it made me think about all the money we spend on those photo packages, and some of the photos I've found MOST wonderful, that DIDN'T ever grow "old."
When my parents lived in New York still, we would all gather on the Cape for two weeks -- a kind of an "open house," where people stopped in and stayed for however long they could stay, then left when they needed to leave. While we were there, my mom would snap photos of all the kids and grands doing all those fun beach-y things: body surfing, sand-castle building, eating corn on the cob, playing beach volleyball... She would also collect buckets full of tiny shells -- whole bunches of them.
Back at home, she would craft simple frames from craft sticks and thin sheets of clear plastic, hot glue the sea shells to the frame, and glue the photos to the back, and mailed them out to all of us at the holidays.
What a great way to remember a happy (and warmer!) time! Just imagine the conversations you'll have with your kids as they select photos and talk about the good times they had. Fun for both the giver and the receiver!
This is NOT a gift I've made (yet) but it is on my list for this year! I love garden ornaments, and calligraphy. And what kid doesn't like smooth stones?
Here is a photograph that I found on Pinterest -- unfortunately, one of those that is no longer attached to its original website. Fineline permanent markers and imagination are all that are required (and a kid to forage for smooth stones). I would spray them with a water-repellant sealer (Modge Podge makes an acrylic sealer that I spray over my paper beads when they are finished - that would work).
July: Bath Baskets
My family knows that I love bath items, especially if they are uniquely scented, or matched together. Call it one of my quirks.
And kids love to assemble gift baskets -- there's something about a collection of little objects that go together that is appealing to children. And this adult, by the way.
When my older kids were little, I used to send away for samples of fancy bath items (the kind you see advertised in the backs of health and gardening magazines -- the ones with herbs in them and interesting wrappers...). We would comb drug stores for travel sizes of organic bath products and add them to the collection all year. Then, at holiday time, we would find decorative baskets and bags, and assemble our gift baskets, including a few full-size products and things like loofahs or bath mitts to round them out.
If you want to check out a line of hand-made, all-natural bath items, see my Squidoo lens on Hugo and Debra Naturals -- mmmm.... so nice.
I had a bumper crop of hot peppers this summer. And there are only so many that you can eat by themselves.
So I began making home-made sofrito -- a staple seasoning in Spanish and Latino cooking. There are many recipes for sofrito, but all are easy to make, right in your blender. And kids love food projects, especially if you are making something that they planted, grew, cared for and then picked, themselves. That's a lot of learning and a lot of love, packed into that gift!
Look at tag sales for fancy jars (I have a few of the old Mason-style jars with glass lids -- perfect for this). You will also need some plastic gloves for handling the cut peppers. Find a recipe for sofrito that you like (I have recommended a few that we like, from the Posh Latin Cook, below), get your blender ready, and start chopping!
Because you will likely be making this in late summer or early fall, when you are harvesting your veggies, you can freeze your sofrito in ice cube trays, then pop the cubes into Ziploc bags to store in the freezer until you are ready to pack your gift. Simply thaw the cubes, fill your jars, label and dress up with a bow!
September: Herb-infused Dipping Oils
Here is an easy gift to make in the fall, when your herbs are at their best. Even the tiniest hands can help prepare these. My daughter-in-law made these as gifts for us this year and I can't wait to try her Tuscany Blend on a loaf of crusty Italian bread!
Scour tag sales for decorative bottles, or check craft stores and the Christmas Tree Shoppes. These oils are best used after the herbs have steeped in the oil for a few months, so September is a great time to prepare them. Just sit them in a dark cool cupboard into you are ready to give them.
The Naptime Chef gives a great basic recipe for dipping oil that she made in 15 minutes.
October: No-Cook Fudge
Oh, my! We also received three (three!) kinds of no-cook fudge this Christmas. I had to hide it from my husband who, although not a chocolate lover, found them irresistible.
There are so many recipes for no-cook fudge available. Make one (or more!) and freeze it in a tightly covered plastic container. Thaw when you are ready to pack it in December, and place the pieces in holiday-patterned plastic bags (most grocery stores carry these in December), tied with a bow.
The kitchen-savvy daughter-in-law who treated us to homemade fudge also created soup mixes packaged cutely in canning jars. What a nice way to practice measurement and volume with your homeschoolers!
All you need is a recipe that is based on dry ingredients (ours was a bean soup recipe, that included dehydrated onions and other dried goods). Measure the dry goods into canning jars, adding each new ingredient to create pretty, colorful layers. Screw on the canning jar lid (don't seal), and add a piece of colorful fabric (fastened with a bow or rubber band) to decorate. Hang the recipe on a pretty recipe card, from the bow.
Alternative: I once received a hot chocolate mix presented this way, with cocoa powder, non-fat dry milk, sugar and spices layered into canning jars. For a tinier alternative, create single-serve mulled cider mixes in little jelly jars. Pretty and fun to make.
December: Stained Glass Cookies
Stained Glass Cookies - fun and oh-so-tasty!
I used to make these cookies when my youngest brother (who is ten years my junior) was a little boy. It was one of those "big sister" moments he enjoyed. This winter, I re-introduced the tradition with my youngest son.
These cookies are so easy to make, and they didn't last long at all! (I think some of us even ate them as a breakfast food. Shh...). Use your favorite sugar cookie recipe, a cookie cutter shape in two sizes (we made stars, but two different diameter glasses would work to make wreaths, too), a few packages of Life Saver candies, and the decoration of your choice.
Roll out and cut your sugar cookie dough, as usual, then use the smaller cutter to cut out the center of the cookie, to leave a hole. Place the candy in the center, and bake -- the hard candy will melt quickly and fill in the space left in the center, creating a "stained glass effect" once the cookie is completely cooled. You can make a few dozen of these in an afternoon -- great for those vacation days right before Christmas, or a surprise snow day earlier in December. I always make sure to have plenty of flour, sugar and butter on hand for impromptu baking in November and December. Add a bag or two of hard candy to this and you'll be all set for these cookies!
After making these many times, I have decided on a few tricks that make the best-looking cookies:
Wreaths made using two different sized glasses are the easiest for kids to make, and bake up nicely.
Many recipes tell you to crush up the candies, but the "glass" will be cloudy if you do -- better to just plop the whole candy in the center of the cookie and let it melt on its own.
You can use any flavor candies, but cloudy candies (like the "tropical" flavor lifesavers, or lemon drops) will make cloudy "glass." The really best "glass" comes from clear candies (regular Life Savers or Jolly Ranchers). My absolute favorite: hard, clear cinnamon candies. Now I'm drooling...
We tried to decorate our cookies using a "convenient" spray tube of frosting with different attachments. No bueno. It is hard for kids (and adults!) to control the flow, and my son was disappointed in his efforts (so we just spread it out like icing). Use a pastry bag or spread the frosting with a plastic butter knife, or just serve them plain.
After they cool completely, pile them onto holiday-themed paper plates, wrap with colored cellophane wrapper, and tie with a bow. Hand them to your guests as they arrive on Christmas Day!
Craft On, My Friends...
These are only a tiny fraction of the possibilities for monthly craft projects that you can do with your children, to create really nice gifts for the holiday season. Besides teaching them how to make beautiful things with their hands, you will also be teaching them stewardship by showing them how to re-purpose items that might normally be discarded, and showing them that the value of a gift comes from the love, time and thought put into it, not the dollar amount on the price tag. You will also be building memories with the time you spend together -- something that is beyond priceless.
Happy Holidays to All! (c) A Child's Garden, 2014.


