Showing posts with label birding. Show all posts

Wednesday, January 9, 2013

Starting an Animal Survey: Winter Birds and Friends

Watching Our Birds, All Year Long


We love to watch our birds. With each season, we change our offerings to suit the birds that come with that season: suet for the woodpeckers in the winter; berries and peanuts for the bluebirds in the spring; oranges for the orioles in June; hummingbird nectar for the hummers in July.

It is exciting to see those birds (and other creatures) that signal changes in the seasons. To chronicle the visitors in our yard, we started a year-long animal survey to usher in 2013.
Our survey sheet -- good for a year of viewing! (c) Kim M. Bennett, 2012

We put together an animal survey sheet, where we can list the visitors to our bird feeders, brush pile and water sources, then check off which months we have observed them. To mark shifts in populations, we are entering a number to show the greatest number of each species observed at any given time (similar to what is done to measure relative quantities of birds in Cornell's Project Feeder Watch).

(Click on link to download a copy for your own study.)


The First Week of Our Survey

The first week of January was a busy one. Here is our list of animal visitors (not counting our own pets, of course -- wild animals, only!), in decreasing order of their abundance (NOTE: We noted the maximum number of each animal that was seen at a given time, to monitor the relative abundance of the species for each month):


Dark-eyed juncos were our most abundant visitors this week.
  • Dark-eyed junco (7)
  • Black-capped chickadee (6)
  • Tufted titmouse (4)
  • White-tailed deer (4)
  • White-throat sparrow (4)
  • Blue jay (2)
  • Great horned owl (2)
  • Mourning dove (2)
  • Carolina wren (2)
  • Northern cardinal (2)
  • Chipping sparrow (2)
  • Gray squirrel (2)
  • White-breasted nuthatch (1)
  • Red-bellied woodpecker (1)
  • Downy woodpecker (1)
  • Northern flicker (1)
  • White-crowned sparrow (1)


Nifty Sightings for the Week

Click on the link for more information.
I always love having the chickadees perch inches from my nose and scold me when the feeder runs out of seeds. But there were some other noteworthy observations this week:

... the junco with leucism -- partial albinism that caused its head and cheek feathers to be completely white, and its sides to be tan in color {my youngest son and I spent a lot of time trying to identify it with our field guides before I found a web article about this form of albinism};
... the great horned owls who perched in the hickory overlooking the feeding area during the night time hours and into the dawn, hooting and hunting {our cats are not happy about being kept in at night the past few weeks};
... the pair of wrens that we watched exploring the inner depths of a folded camp chair on our front porch (you know they'll nest anywhere). {My eldest son and I sat in the car after going to the gym, so we wouldn't disturb the busy pair}


What We Offered Our Feathered and Furry Friends

Click on the link for more information.
We had run out of black thistle seed, so we had filled both our tube feeder and the regular feeder with mixed seed, and placed some stale pancakes in a suet feeder (as an alternative to putting them on the ground, which attracts our own dog before the outdoor critters get to the food). We bought some berry-flavored suet dough (loved by the titmice), and threw bread crusts out on the ground.

Read-Alouds to Go With Your Studies

Our two favorite animal books, the Burgess Bird Book for Children and the Burgess Animal Book for Children, are shown here. Click on the links in the captions for more information about these wonderful classics.

[This post was linked to the following blog carnivals:]

Outdoor Hour Challenge ~ Winter Bird: Chickadee
Simple Science Strategies:  Patterns
A Carnival of Homeschooling


Thursday, October 18, 2012

Adventures in Composting: The All-Season Indoor Composter


I am so excited! I just emptied my first batch of pre-compost from the All Season Indoor Composter, by UncommonGoods...

I first learned about UncommonGoods during a Mother's Day Pinterest board competition last spring. Because some of the pins were to come from their products, I had the chance to browse their online catalog. They were certainly uncommon, and right up my alley!

UncommonGoods


So when I was offered the opportunity to try out a product in return for writing an honest review of it, I had already started a wishlist. I found so many interesting, fantastic gift ideas here!

I was fascinated with the composter, for several reasons:

  1. I've been a "composter" for decades -- just feel good returning things to the earth...
  2. I currently use a small roaster with a lid to store compost prior to heading to the compost pile, and tend to pile it then set the lid on top of the pile, instead of emptying it promptly. Yuck.
  3. I need something that will fit under the sink, since my counter is too crowded for a countertop storage container.
  4. I was in the middle of a homeschool unit on mushrooms, fungi and other "composters" and the kitchen composter fit right into our studies.
A wonderful man named Rocky sent the composter to me, with a refill of the bokashi that fuels it. And the rest was history!

Here's our composting story...


The All-Seasons Indoor Composter, $48 at UncommonGoods.


The Composter


The composter isn't really a "composter." Composting is an aerobic process: bacteria, fungi and actinomycetes that love air break down the vegetable products into an organic material that you can use to amend your garden. In the All Season Indoor Composter, the process actually is fermentation, not composting, and is anaerobic: it depends on you depriving the microbes of oxygen. (See this YouTube video for the difference -- not sure about his claims that compost piles create environmental toxins, but he explains the difference between the two process well. The Compost Guy provides a little more balanced presentation of traditional composting vs. bokashi composting).

So why is this important?


How you use the composter, and how it's constructed, actually keep air out. (Those of you who compost, and are used to turning the pile to aerate it, will understand the difference).

The composter, itself, is a neat bin (about 5 gallons in size), with a tight-fitting lid, a handle and a grate that keeps the composting products from the liquid which collects with the fermentation process. The composter comes with a bag of bokashi, a mixture of wheat bran and molasses which is "inoculated" with fermentation bacteria, which break down your compost in the bucket. Rocky sent along a second bag of bokashi, but I didn't need it. The composter fit perfectly under my kitchen sink.

The All-Season Indoor Composter fits neatly under your sink.

Bokashi - the Fuel for the Composter

A little about bokashi (from my research)...

Bokashi is a mixture of wheat bran, molasses and a special blend of microbes called "effective microorganisms," or EM, for short.  If you read reviews of composters such as this one, some folks talk about the odor of the bokashi. Do you want to know what it smells like?

Cattle feed.

If you're not a farm girl or guy, it's hard to explain. It's sweet smelling, a little like taking a big sniff in a box of guinea pig pellets, but stronger. That's all. Not nasty. Very alfalfa-y.

Bokashi, the fuel that powers the All-Season Indoor Composter.


In fact, I'm thinking that, with the exception of the microbes, the mix is probably a lot like most animal feeds. My dog was very intrigued with the smell of the bokashi blend as I prepared the bucket.

You can make the mix yourself, or (conveniently) purchase bokashi refills from UncommonGoods, for $12.00.

Filling the Composter

It is extremely easy to use the composter:


Put a layer of bokashi on the bottom of the composter.
  • Remove all packaging from the composter.
  • Add a generous handful of bokashi to the bottom of the composter, taking care not to block all the holes in the bottom grate. 
The grate at the bottom of the composter lets the liquid that accumulates during the fermentation process drain out of the compost, and into a separate part of the composter. From what I'm able to read, this was an improvement based on consumer suggestions.


    Any kind of vegetable and meat waste can be added.
  • Add your organic waste to the composter.
The directions say that you can add the following items: any vegetable scraps, and small amounts of meat scraps. You are not supposed to add materials that have already begun to spoil.

What I added: stale cereal, vegetable scraps, used napkins and paper towels, coffee grounds and filters, small amounts of paper, egg shells.


Stir the mixture after each addition of waste.
  •  Dust surface of waste with more bokashi, then stir with a spoon to coat all.
The directions say to cut everything into small pieces. I didn't -- I wanted to compare what it did with materials that I would put into my compost pile as is. I know if I have to chop my garbage, I won't use the composter.

I was not brave enough to add meat scraps to the composter this time.


Add an additional layer of bokashi before sealing the bin.
  • Each time you add waste, coat the layer with a generous amount of bokashi. 
  • Stir after each waste addition.
  • Push down the compost to push out extra air.
  • Add another dusting of bokashi before sealing.
Don't be skimpy with the bokashi -- it contains the microbes that keep this process going without rot organisms, that cause bad smells.


Seal the mixture with a plastic bag or a plastic plate.


  • For added air-tightness, cover the compost with a plastic bag or plate, to keep air out.
I tried a nicer looking styrofoam plate, but didn't find that 1) it covered the whole surface of the compost or 2) sealed the mixture as well.

Oh, well...


  • Put the composter under the sink.
I have to say that I never noticed ANY smell from the composter. It seals extremely well. And I didn't use it exactly as the directions said (but DID use it the way I know I would use it):

  1. I tossed the materials into the bin, then added bokashi and stirred it at the end of the day, but not with each addition.
  2. I probably didn't always get the lid on tightly.

The Finished Product

After about 10 days, the composter was full (that seems typical for a family of three). The directions said to let the material process an additional 5 days before removing from the bin, so I did. Here is what we had after that:


The "tea" -- liquid that accumulates with fermentation.

The directions say that you can drain off the liquid periodically using the handy spigot at the bottom of the composter. I suppose this is more of an issue if you use a lot of juicy products (but they say to not add too much liquid to the composter, so...).

Anyway, this is all that accumulated in our bin (about 1/2 cup). I filled the rest of the little container with water, and used the mixture to water my rosemary plant.


The compost, after 15 days of processing.

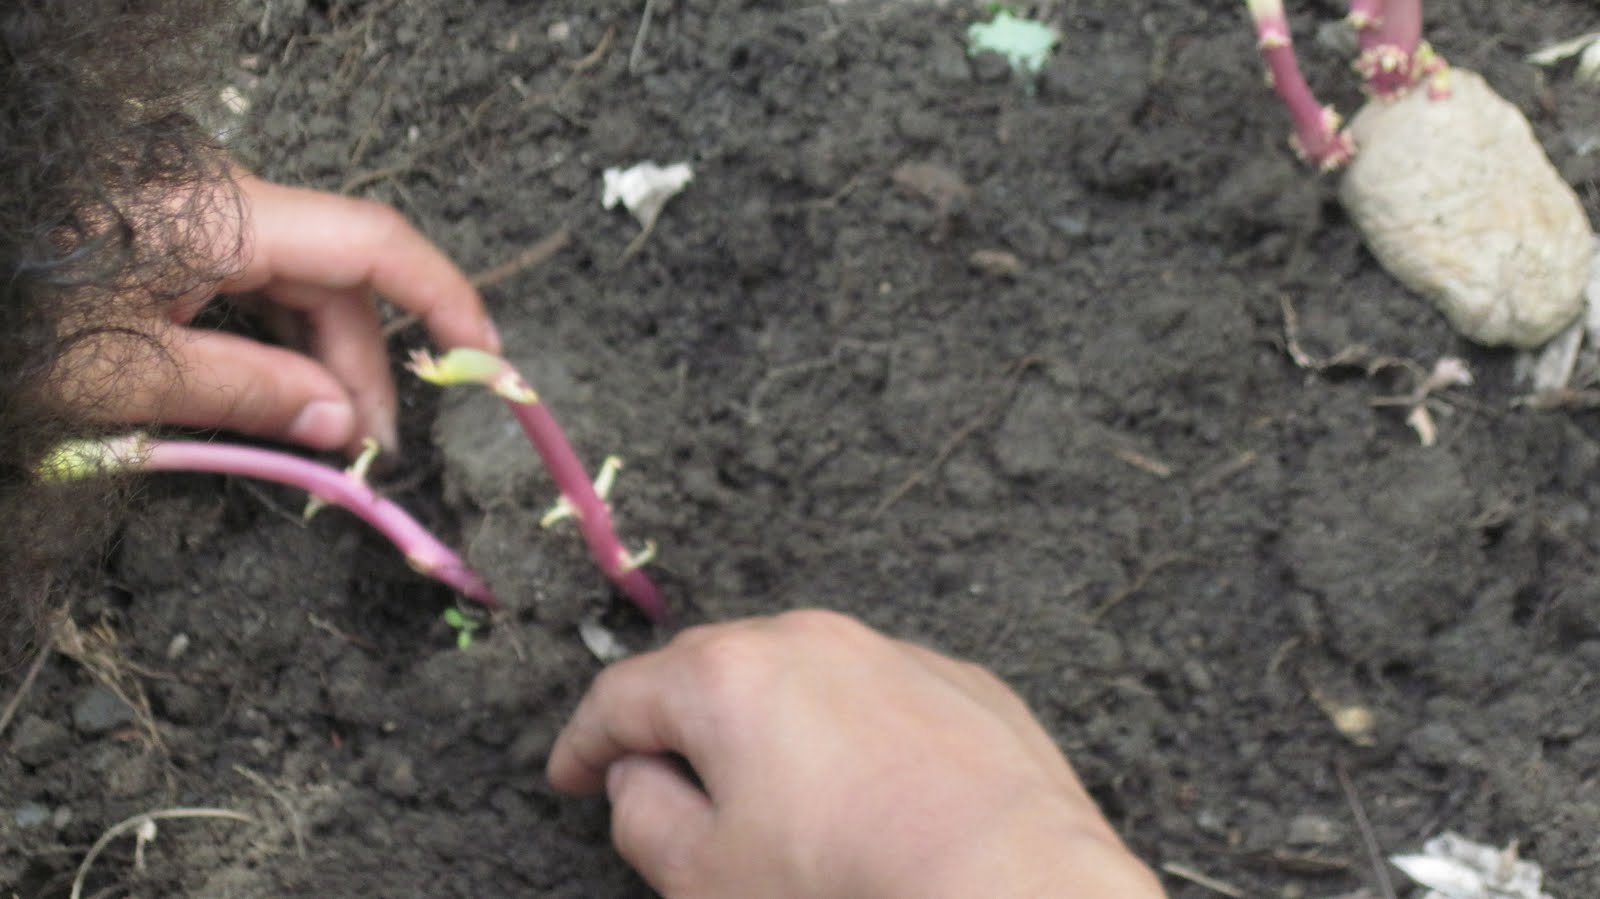
After the 15 days, the mixture is not yet done. The directions tell you that you have to now bury the mixture in the ground to finish the process. I haven't done this yet (we just emptied it this evening), and wonder what I will do in the winter (you don't dig anything in the ground here in New England, in the winter).

I was impressed with the amount that the melon rinds, eggs shells and cucumber peels broke down. Good stuff.


Another view of the finished product. Nice, huh?

What I'd do next time:

  1. Dig the hole for the finishing of the compost ahead of time, so I could just dump it in the hole when I'm finished.
  2. Try to compost everything organic: paper from the office shredder, paper towels and facial tissues, shredded newspaper (why? because I normally compost all these things -- if I can't compost all the things I normally compost, I'll be disappointed).
  3. Try adding meat scraps to the compost.


The empty bin.

The directions tell you not to add anything that already has begun to spoil. That was a little disappointing. There's something a little ironic about throwing the rotten cucumber that hid in the back of the crisper, in the garbage, instead of in the composter. I think I might try it in the composter next time. I'll let you know what happens.

The smell at the bottom of the bin wasn't as pleasant as the top. But it wasn't as bad with the bokashi as most rotten stuff smells. 


My Recommendations

The All-Season Indoor Composter provides a spacious, odor-free way to store your compost inside until you can get it into the compost pile or pit. The bokashi makes the food waste break down much more quickly than it would in an empty container on your counter, and the pre-compost product breaks down to about 1/2 its starting volume during the finishing process in the bin. Although you have to then bury the product outside before using it as compost (it's not finished yet), the bin at least provides a convenient way to collect these scraps without mess, smell or pest problems in the house.

If you like feeling good about returning organic materials to the environment, then the All-Season Indoor Composter,  from UncommonGoods, is a perfect addition to your "green" living routines.

Mine is being refilled for another "go-around," even as we "speak."


Other Things on My Wishlist at UncommonGoods

There are so many great unique finds for girls at Uncommongoods -- I am particularly fond of the Periodic Table Building Blocks, being a science girl and somewhat of a geek.


But, their picks for guys are just as intriguing: a President Block Set (my history-loving youngest son would go bonkers over that), and the older two (who are former Rubix cubers and chess masters) would appreciate the Lab Test Games.


For myself, I love the one-of-a-kind garden accessories, in particular the Apple Anchor Hummingbird Feeder and the Butterfly Puddler. I know these would be perfect in my garden -- we get a zillion hummingbirds (they come to anything red or shiny), and the orioles and bluebirds eat fruit left out for them in the yard. I also have noticed many butterflies drinking out of the "puddles" in plant saucers, so the puddler would be a pretty addition -- like a stepping stone with a dual purpose.


I'll have to wait until spring for those things... sigh. I so miss summer already.


Will you help me out? 

Please click on the link below to answer a short, 8-question survey about your experience on my blog. No ads! Just information for me. Thanks so much!

Take the October 2012 Reader Survey  now.

Thursday, January 19, 2012

Winter Bird Feeding


Tree felled by hurricane Irene in August.
We always have so much fun feeding our feathered friends. Our weather this year has been so unusual -- a hurricane shut down Connecticut for a week in early September, then a fluke snowstorm at the end of October put the brakes on fall before the leaves had even thought about changing color.  All this, followed by one of the warmest autumns we have seen in years. The week after the New Year began, we were all gathered around a bonfire for an evening of outside fun -- in sweatshirts!

But, this IS New England, and into every year a little winter must fall. The weatherman was predicting a turn in the weather, so we spent last weekend making sure that all our feeders were well-stocked. And we decided to make some pine cone feeders as a Sunday project.

First step... find some pine cones!
We headed out for a little hike to find the materials for our project before lunch. This was a nice time to talk a little about plant identification, and enjoy a crisp January day.


While I readied my camera (can't leave home without it!) and backpack, the youngest hiking partner headed out to find pine cones. He came back, dejected, to say that all he could find was a little one (which was actually a hemlock cone).

We walked into the woods, and I showed my son a seedling pine (below). Of course, it would have no cones, but what it told us was that there was a mature pine somewhere nearby. So onward we looked.

Many people call all evergreen, needle-bearing trees, "pines."  However, for a pine cone feeder, other large cones simply won't do. So it is important to know what to look for (or just go to Wal-Mart and buy a bag of pine cones -- but what's the fun in that?).

We didn't have to walk very far before we saw...

THE MOTHER PINE!

Pinus strobus,  Eastern White Pine


Pines can be much larger than this tree, but, compared to the rest of the woodlot, this tree was a monster. And it was the only pine as far as the eye could see. So we deduced that all the baby pines we had seen on the forest floor were all the offspring of this tree.
In the forestry industry, in a stand of trees of the same species, there are often giant, very fertile individuals that sometimes tower above the rest of the woodlot. These are referred to as wolf trees, and are often used as seed sources. This pine reminded me of a wolf tree, but it was really the only pine in the stand. We hiked to the base to look for cones, knowing that any cones still on the tree would be very high up, out of reach. 

White Pine cones


We were in luck -- there were hundreds of them. We chose cones that had their scales open (you'll see why when we get to the cooking part).  We inspected the white pine we had found, and talked about how the bald eagles in Maine prefer white pines for nesting, as they tower above the other trees and offer a sturdy set of branches for their huge nests. Have you ever seen a bald eagle's nest? It is truly an immense structure. Put it on your "bucket list."
Pine identification
Do you know how to identify a white pine? It's really quite simple. 

Pines are classified as 2-needle pines, 3-needle pines and 5-needle pines. If you look closely at a pine branch, you will see that the needles grow in clusters, with a brown, papery "sleeve" at the base of the cluster. If you pull the needles close together, they will fit close together, and form a cylindrical "tube", which, long, long ago, was the actual leaf of the pine. Over time, the trees evolved and the leaves split into needles of various configurations, but all held together by that papery sleeve.

White pine needles in 5's
White pines are a 5-needle pine, which means their needles are bundled together in groups of 5. There aren't many native 5-needle pines in the East, so this helps us narrow down the field a bit. What's more, white pine needles are fine and soft, and seem to flow off the branch -- they don't stand out stiffly as some others do.

Here is a photo comparing the hemlocks which vexed our son so, next to a seedling pine. The pine is at the right, center. Hemlock cones are only about 1/2 inch long, so they wouldn't really work for our purposes, but they make cute additions to potpourri (that's for another day...)

 
We filled our bag with cones, and headed back to let the frost thaw off them while we had a bowl of hot vegetable soup and a grilled cheese sandwich for lunch. Then it was on to...
Pine cone bird feeder time!
I hope you cook at home with your kids. There is so much to learn by cooking, you use all your five senses,  you talk to one another, and learn a life skill. AND you can eat what you make (usually). Before you say, "Not this time," I have to tell you that I once ground my own beef fat with dried cranberries, bird seed, peanuts and raisins, to make my own suet cakes. We used a big stainless steel sausage grinder, and my eldest son and I took turns grinding. While I went to get the containers to freeze the suet cakes in, my little one sampled the beef suet!

Ingredients
  • large pine cones
  • peanut butter (smooth or chunky)
  • lard or shortening
  • bird seed
  • string
  • a medium saucepan and wooden spoon
  • a cookie sheet and waxed paper
Scoop peanut butter into the saucepan (we used about 1/2 cup for 6 pine cones). Add about 1/4 cup of lard or vegetable shortening (if your winter isn't below freezing, use lard, as the vegetable shortening will melt from the feeders and be messy). When the peanut butter mixture is melted (be careful not to scorch it), add about 1 cup of bird seed. (We used mixed milo and black oil seed, but any mix will do). Let the mixture cool until the peanut butter is back to spreadable consistency. 


  When the peanut butter mixture is cool, spread it onto the pine cones, pushing the mixture under the scales of the cone (this is why we wanted cones with the scales all the way open). I used my fingers, but my son wasn't fond of the feeling of the peanut butter on his hands, so he used a plastic knife.


Continue spreading until you have filled all your pine cones. If you want, roll the finished cones in additional bird seed to cover (we didn't think about this until after we finished).


Carefully tie string between the scales near the stem end of the cone (don't just tie around the stem, as the string will slide off -- use the last scales as a "hook" for the string).


Place your pine cone feeders on the cookie sheets (lined with waxed paper) to dry a bit.


To make them easier to handle, we placed our cookie sheet on the patio table, so the peanut butter would freeze. My son worried that the birds would eat them -- then we kind of laughed about this, since that was, in fact, the point of it all!


We tied our feeders to the trees, creating little S-hooks out of paper clips, and placing the feeders all around the bottom branches of a tree where we hung our other feeders. 


A Migrating Surprise!

Monday, the weather was unsettled, warming up strangely before a mighty wind rushed in. There was a winter storm brewing for Monday evening, and the wildlife was preparing. About mid-day, I noticed that the cats and dog were lined up, eagerly observing something outside. When I went to see what they were spying on, I saw...


Bluebirds!


There was about a dozen of them, on the pine cone feeders, on the suet basket, under the feeders... One even flew within a foot of the excited pets, to pick up some dropped seeds right by the sliding door.  They stayed all afternoon, feasting with the chickadees, juncos and titmouses.

The next day, we had three inches of snow. Not much by New England standards, but probably enough for the bluebirds to say, "You know, I think it's time to get moving." By Tuesday, the juncos and chickadees ate without their blue friends.
---------------------------------------------------------------
Follow-up Possibilities
If you haven't checked out our unit on thrushes, Bird Migration: A Study of Robins and Other Thrushes, please do -- it offers the possibility of a year-long study of migration and a host of other topics.

The Handbook of Nature Study website always has timely nature study activities -- Barbara has been posting a lot on winter feeder birds -- check out her website frequently.

We continue to read the Burgess Bird Book for Children -- we downloaded it to the Nook Color, which is very exciting to our tech savvy 8-year-old. You can also read it online, for free, via the Baldwin Project. You can read it from cover to cover, as we are doing, or you can read just the chapters on thrushes: 
We are enjoying exploring our woods, and we have a number of evergreen plants to observe: pines, hemlocks, mountain-laurel, princess pine, partridgeberry, wintergreen, and some really hardy ferns that aren't really evergreen, but try hard to be! We will probably do some reading in the Handbook of Nature Study, on one of our local evergreen plants.

We were sad to hear that our favorite Bird Stack birdwatching site is closing down. We want to continue to take data on our bird feeder friends. Here are some options we might choose from:

  1. Project FeederWatch's tally sheets - great data on weather and birds, even if you are not participating in the study (but DO! -- it's fun)
  2. The Great Backyard Bird Count 2012 - officially February 17-20, but the form could be used any time. If you haven't ever participated, DO!
  3. The Notebooking Treasury has a bundled set of notebooking pages, Nature Study: Birds - Complete Set, with a page for just about any bird study you would want to do on any bird you'd like to study.
------------------------------------------------------------------------------------------

Do you have a preschooler or kindergartner at home? Take a look at our web page on Building a Snowman -- a great integrated unit for the classroom teacher, as well.

Stay tuned for our next blog, to see where we take our birdwatching and nature study endeavors...

Saturday, September 10, 2011

Flying Creatures, Lesson 2: What Makes a Bird a Bird?

Lesson 2: What Makes a Bird a Bird?
How we implemented "Exploring Creation through Zoology 1: Flying Creatures of the Fifth Day, Lesson 1
__________________________________________________________

Links will be updated as we add new blogs and web pages. This is not meant to be an exhaustive list, but an List of the activities, projects and resources that we actually used to complete the lesson (like a window into our science class!).

Please check back for web pages on key concepts, strategies and skills as I write them.

__________________________________________________________

Key Concepts: field identification, anatomy, field marks, behavior, communication, experiment, variable, measurement, scientific and common names

Key Strategies: using field marks, keeping a journal, making an organized list, mapping

Key Skills: identifying birds, using a field guide, following a procedure, measuring
_________________________________________________________

Subtopics
_____________________________________

(includes links to correspond web pages and blog entries, as we complete each and post about it)

  • Bird Watching (pp. 22-23)
  • Benefits of Birds (pp. 23-24)
  • Identifying Birds (p. 24)
  • Field Guides (p. 25)
  • Do You Reside Here? (pp. 25-26)
  • Field Marks (pp. 26-27)
  • Wings (p. 28)
  • Crests (p. 29)
  • What's in a Name? (p. 29)
  • Passerines (pp. 29-30)
  • From Large to Small (p. 30)
  • Bird Behavior (pp. 30-31)
  • Habitats (p. 31)
  • Bird Banter (pp. 31-32)
  • Songs & Calls (pp. 32-33)
  • Claims to Territory (p. 33)
  • The Purpose of Calls (p. 34)
  • Other Communications (p. 34)
  • Bird Banding (pp. 34-36)
  • Nature Points (p. 36)
____________________________________________________

Additional Readings
__________________________________

Sparrows Nature Study:
 ____________________________________________________

Activities, Experiments and Projects

 Showing and Telling --
  • Daily oral narration
  • "Fascinating Facts About Birds" notetaking activity
  • Written narration: "What Do You Remember?"
  • Scripture copywork
  • Vocabulary crossword
  • Notebook activity: "Map a Bird"
  • Notebooking pages --  house sparrow, song sparrow, white-throat sparrow, white-crowned sparrow
Strategies to Learn --
  • Try This! - (Using field markings to identify)
  • Try This! - (Using field markings to describe)
  • Try This! - (Using bird songs, calls and sounds to identify)
  • Mapping field markings
Experiments to Conduct --
Things to Create --
Other Things to Do --
  • Nature Points: Birds in My Yard (life list) [NOTE: We created ours online, using Birdstack]
_____________________________________________________

Other Links and Internet Resources
Handbook of Nature Study (Harmony Arts)
WhatBird -- the Ultimate Field Guide
Birdstack


Friday, May 6, 2011

Our Garden is For the Birds!

The month of May always amazes me. The month begins with only a hint of greenery, looking more wintry than springy. By the 31st, however, the trees are fully leafed out, and the world looks like summer. Even since the 1st, the changes in the garden have been incredible.

Malik and I planted our snap peas today, and are gathering "branchy branches" for pea-staking them this year. The inside of my house is starting to feel neglected as we spend more time outside. Oh, well...

We bought a new thistle seed feeder, and repaired the bin feeder (a big wind in the fall blew it down), and have been enjoying the many birds that come to them. We also cleaned out and filled the bird bath, which gets a lot more traffic now that we moved it into the corner of the garden.

In homeschool, we have begun a bird study, since we see so many of them (this surprises many people, who think a city lot would only attract English sparrows).  Our study is a meandering one, and includes identifying bird calls, site identification of birds, learning the parts of a bird's body, and (because my son was interested in it), a food study to see what kind of food they prefer.

If you want to try out your own bird food study, here is the journal page.

The Notebooking Pages Treasury has a beautiful set of notebooking pages for a bird study (we love data tables, so that is the only thing I wanted to add to the set). The Treasury has some free pages, or you can download collections for a charge (very economical for what you get). Or, you can do as we did, and pay an annual  fee of $52.95 for unlimited access to the entire treasury.

If you want some other kinds of pages for your bird journal, check out Enchanted Learning. There are some free pages, or you can pay a $20 annual fee for unlimited access (that's what we did). They have all kinds of bird pages, from bird anatomy to comparison between birds and dinosaurs, to life cycle pages. Good stuff.


Here's our bird list for the month:
  • Catbird
  • Cardinal (a mated pair)
  • Flicker (a mated pair)
  • English sparrow
  • Common grackle
  • House finch
  • Goldfinch
  • Whitethroat sparrow
  • White-crowned sparrow
  • Wren
  • Mourning dove
  • American crow
  • Phoebe
  • Northern oriole (nests in the oak in the corner every year)
  • Downy woodpecker
  • Warblers that we haven't seen yet...
________________________________________________________________

Check out my other recent web pages (I've been busy):

Science Skills: Making Observations and Asking Questions -- I added another activity called "No Place Like Home," a study of the secret life under a rotting log
Books We're Reading in Homeschool-- a running list of the titles that we are using for homeschool
Road Trip! Field Trips for Homeschoolers -- a list of our favorite outdoor experiences away from home
Lucky, the Wonder Dog and How He Lived Up to His Name -- about our doggy :)
Literacy 101 -- the basics of literacy instruction, using The Daily Five
Living Math: Beyond Math Facts -- a description of The Rule of Four

_________________________________________________________________

Here is a link to a fellow gardener's page, with lots of garden lay-outs and information about different styles of gardens.

I also love Better Homes and Gardens for their Garden Planner and downloadable garden plans. Check them out and make a wish list!


    Sunday, May 1, 2011

    Are Your Peas Planted Yet?

    In this part of the country, we have some traditional guidelines for farming and gardening: Corn should be "knee-high by the 4th of July." Plant root crops (carrots, turnips, etc.) when the moon is waning -- never plant anything during a new moon or full moon (I don't know about that one -- I'm not organized enough right now to take that into consideration, but maybe I should!).  And the one I try for: "Plant your peas on St. Patrick's Day." In Connecticut, the ground wherever I've lived is always a bit squishy for peas then, but I DO try to get my peas in as soon as the ground is workable.

    So we have added peas & carrots, kohlrabi, a bunch more potatoes and onions, and some perennials to our garden over the past week: two new coralbells, a double-flowered purple coneflower, a gold-leafed bleeding heart, and an iris with jaunty striped leaves. We even got excited during this beautiful stretch of weather, and planted our pole beans, complete with their refurbished teepees. Then we moved around some wildflowers from last year's experiment with a bargain-basement box of wildflower mix -- found them proper homes grouped together in the beds. As we worked, our resident robin and catbird followed us around the yard, mining the newly overturned soil for grubs and worms. Malik is trying to teach the catbird to eat out of his hand. We'll keep working on it.

    It was during our last planting extravaganza when I spotted the rose-breasted grosbeak on the feeder. Now, we live in Hartford, a small city, but definitely not even suburban -- very urban. But our lot is very large, and protected by a rambling hibiscus hedge row on two sides. And it backs against the lot of a rec center. So there is a nice little green spot for critters. And we get a lot of different birds that you wouldn't expect in the city.  But I had never seen a rose-breasted grosbeak here in the seven years we've lived here. I was so excited to show the bird to our youngest son that, when I crouched down to show it to him, I backed over the brick edging to my rose bed, and ended up sitting directly on my set of "Knock-out" shrub roses!

    So that was a little embarrassing. Unfortunately, I guess I grabbed onto the nearest thing to keep from falling. Which happened to be my son. My poor baby came right into the rose bushes with me! He was not happy with me. But he DID see the grosbeak, and we looked it up later that evening for our notebooking time.

    Here are updates to our bird list. I found an excellent site to add to your links for nature study, if you are studying birds: "Birds & Birding" -- tons of information, links to birdsongs, games, etc.  If you click on the individual birds, you will go to the individual page on that bird from the site. Also, go to my post from last time -- I have edited the bird list so it is "live" too! Have fun!

    American Robin
    Blue Jay
    Common Yellowthroat (heard, not seen)
    Eastern Towhee (female)
    European Starling
    Rose-breasted Grosbeak

    The Notebooking Treasury has a wonderful set of science notebooking pages, which includes a number of pages for common North American birds. You can download it for free, but also check out the information on the complete North American Birds package, which is available from the site for purchase separately. We purchased the annual membership, which gives you access to the complete Treasury -- recommended!